
Framer is a popular site builder trusted by leading startups and Fortune 500 companies. I will show you how you can enable Page Actions analytics for a website build with Framer.
As always, the first thing is to create a new site in the Page Action’s dashboard. Go to settings and click “Add new site”. Enter your site ID and confirm. Now, the project is created, and you will see installation instructions. You will need the code from the “HTML script tag” tab, so don’t close it yet.

Framer allows you to add custom code to your pages, and we will use that feature. You can learn more about it from this Framer Academy lesson.
From the Framer menu, select Site Settings and Custom code. Create a new code entry by clicking Add code.
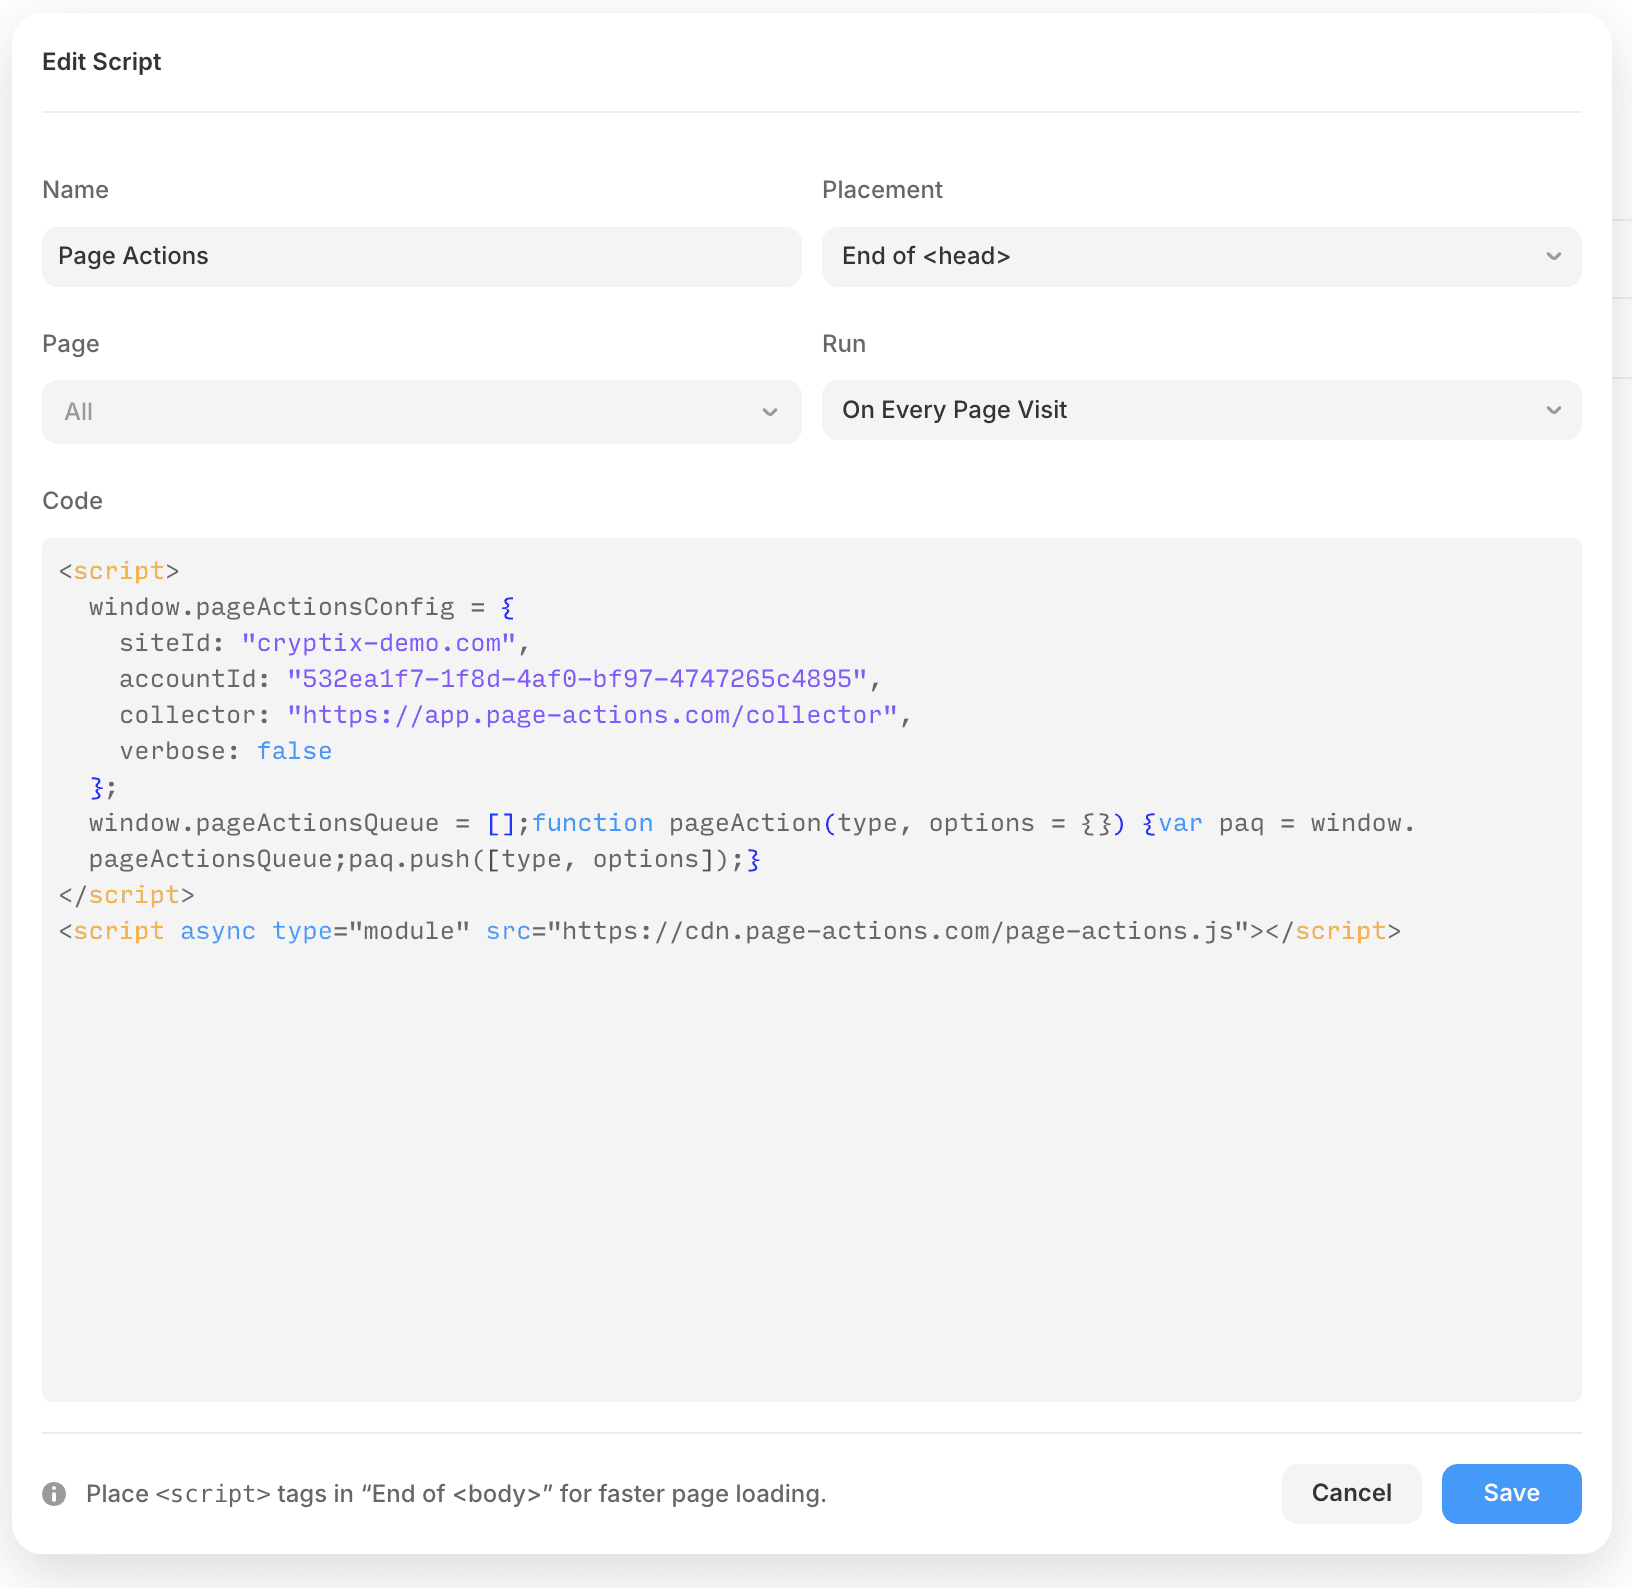
Copy <script> tags from Page Actions to the code field in Framer’s custom code. Enter a name, and select to place this code at the end of <head> tag on every page. Also choose to run it on every page visit. You can see filled form below.
Save it, then publish your project. Next, visit your website and check whether page views appear in the Page Actions dashboard. Remember: in preview mode, the custom code isn’t loaded, so you won’t see page views there.

Report click actions
My demo page, which is available here, has multiple links that I want to track. The header navigation links scroll to the given section on the home page.

There is also a green button called “Get started now”, and I want to report a conversion action when it is clicked.
To connect these buttons with Actions we can use a feature called Tracking in Framer. First, we need to add a Tracking ID to links and buttons that we want to monitor. Select a clickable frame and add a value in Tracking field in Link section. If this field is no visible, you need to add it by clicking “+” icon.
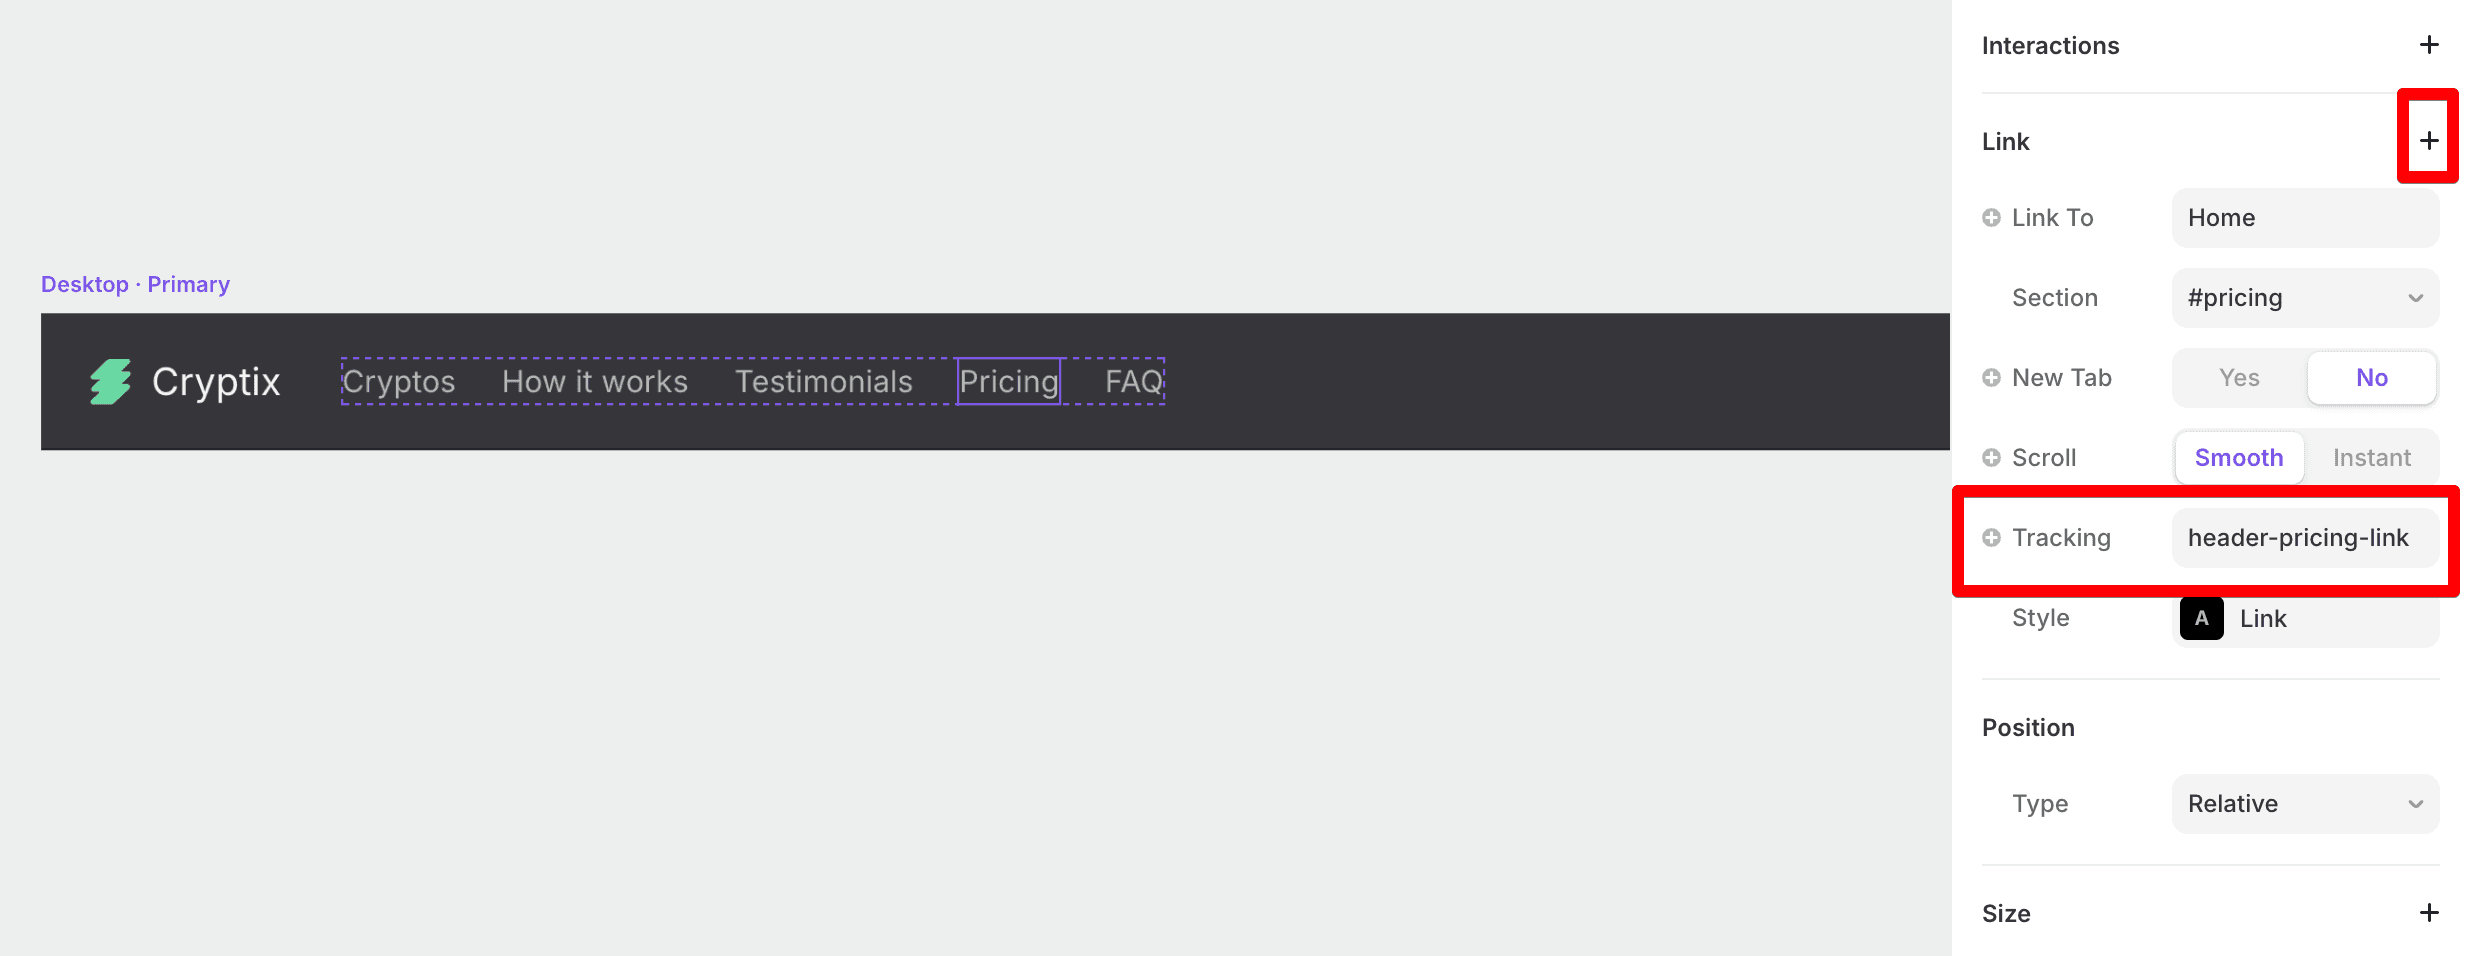
The "Get started now" button, is a little bit different because we want to make it a conversion action. Since Framer doesn't allow to set tracking parameters other than ID, we will use a convention to distinguish conversion actions. Any tracking ID ending with "-conv" will be treated as a conversion action. For this button I set the tracking ID to "hero-get-started-conv".
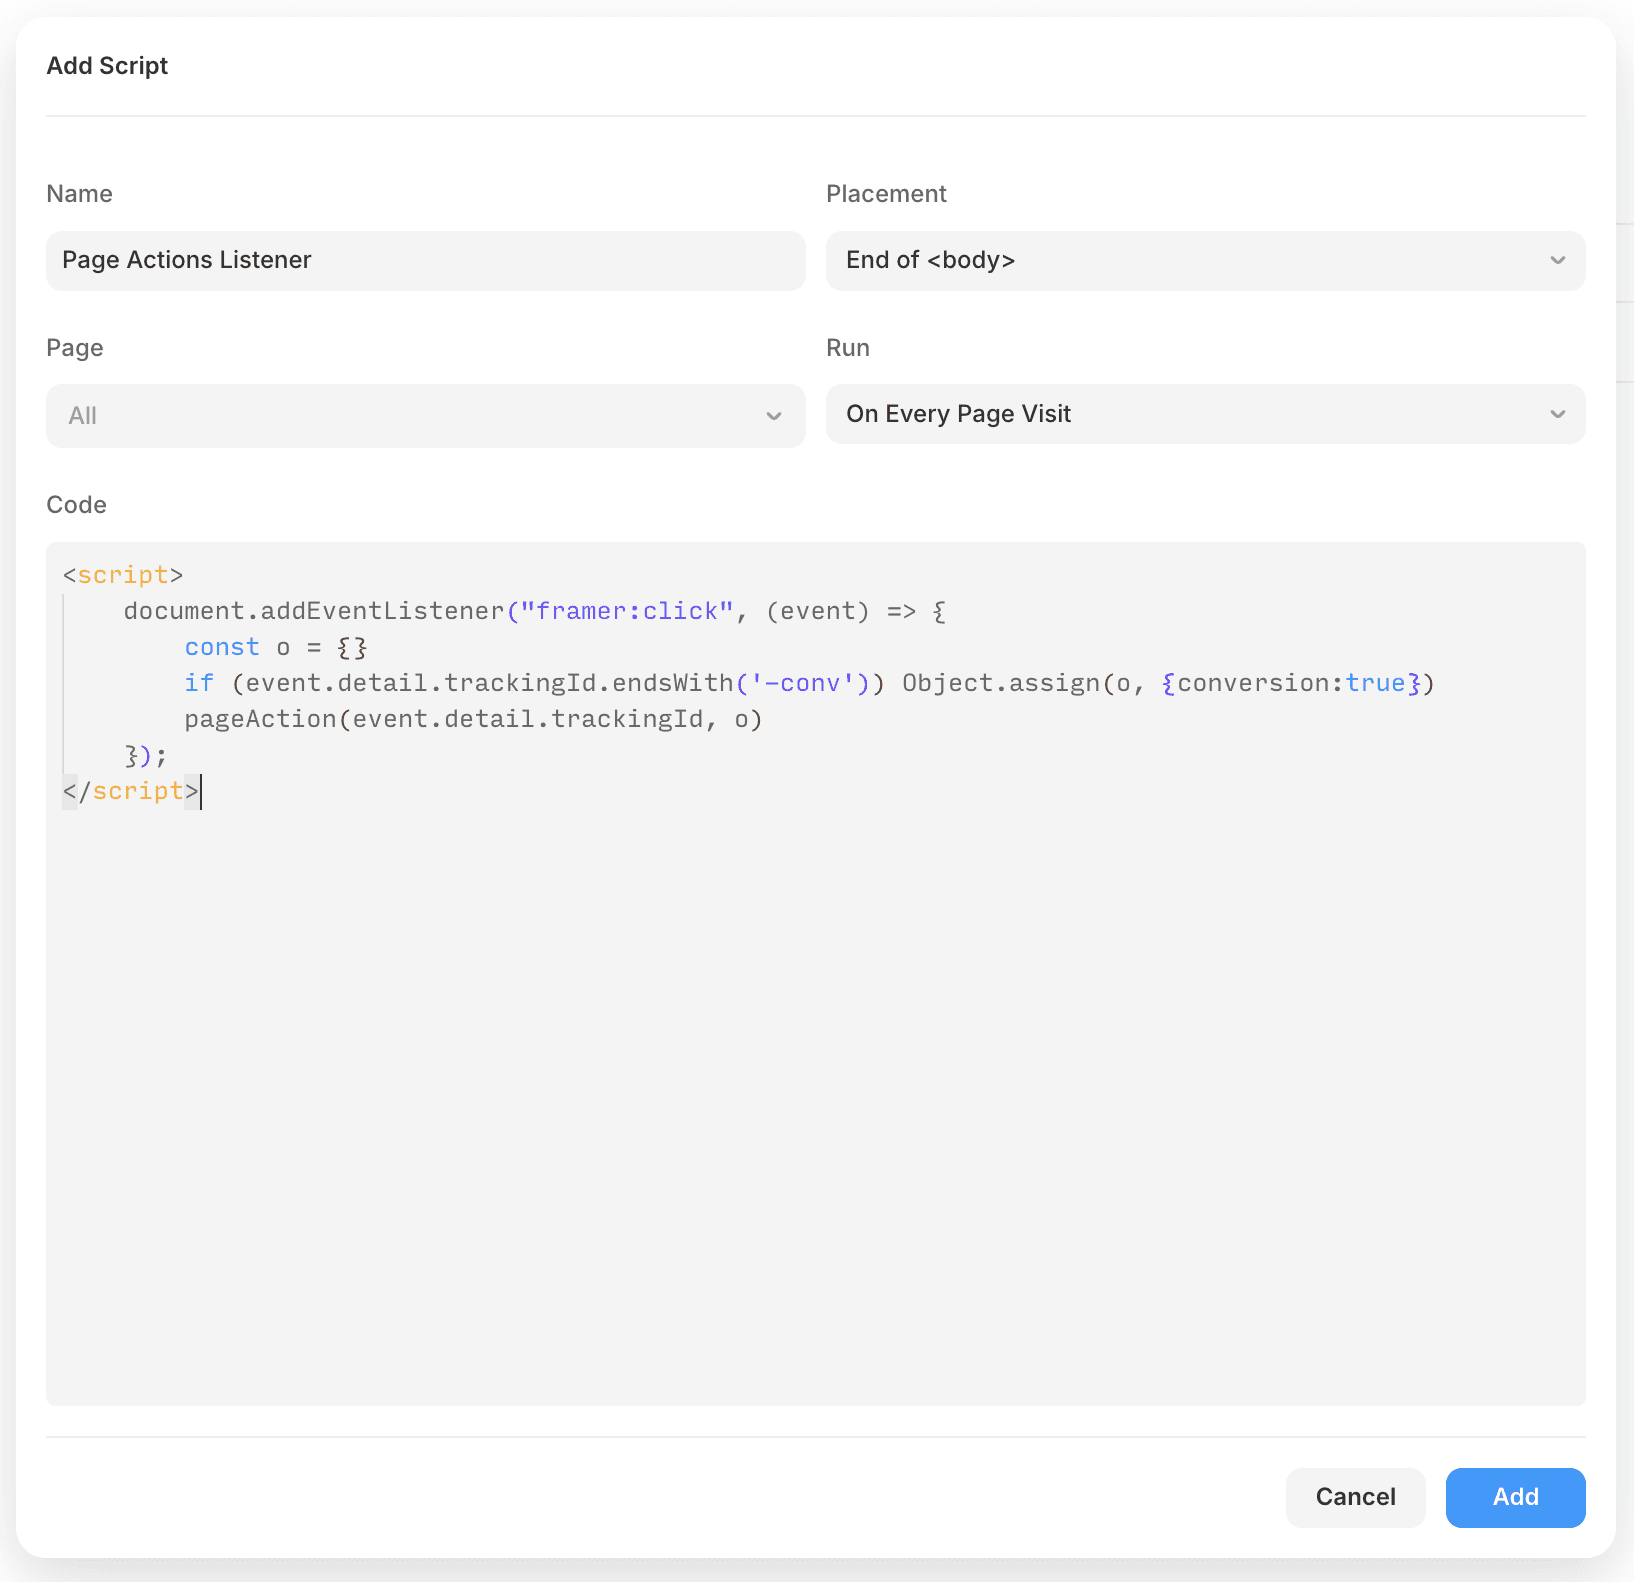
Now is the time for a final step. We will add an event listener to register actions. Open the Custom Code settings in Framer and add the following script tag:
Again, publish the project, and now is the time for a final test. You will see your page views with all the link and button clicks that the user did.


